Prelude to colour:
Since starting The 35mm Project in 2013 I have sent all my colour film to labs, but over the last eight months I have had some great results with black and white since taking the time to really understand the development process and what I want from film. My negatives have never looked better and with every process, push, pull or out of the box I am learning. Now, I want to explore colour processing to hone my skills further, to save money and to see (if any) what difference in quality there is between my negatives and the labs I once used. I am interested in good results and bad results, colour shift, colour cast, what mistakes I make and what affect it has on the photograph, will it change the image for better, or worse? Lets explore!!!
Step 1: Receiving the goodies!

Contents of photograph: Tetenal C-41 kit, 3 x 1 litre brown chemical storage, 2 x 1000ml jugs, 2 x 600ml beakers, 1 x 150ml beaker, Ilford stop bath, Ilford rapid fixer, Rodinol R09, Hama Negative Storage, 2 x Patterson negative clips, scissors, cleaning equipment, syringes, development tank, 2 x spools, negative cleaning alcohol, thermometer, chamois, microfibre cloth, agitator, eyepiece. All equipment purchased from Silverprint.
Most of the items in the photograph above I already had but today (05/06/18) I received a pack of Tetenal C-41 Developing Kit. YAZOOOO!

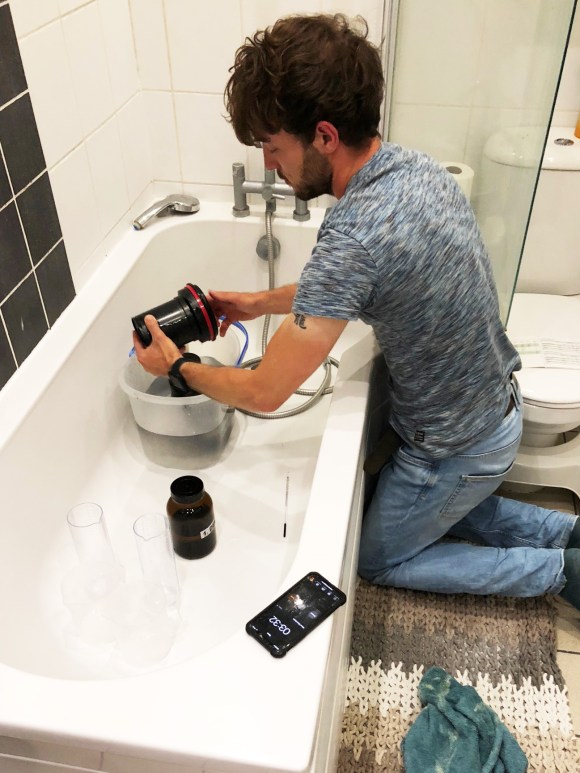
Step 2: Setting up
Setting up the gear was easy! I followed a similar process to YouTuber Wild We Roam and also referred to YouTuber The Art of Photography. I would check both these guys out, their process is simple to follow and informative.
I labelled the bottles with steps so the chemicals aren’t mixed and it’s easier for me when concentrating on temperatures and timing. It’s important to keep the chemicals away from one another, especially bleach to developer as the bleach will neutralise the developer and stop it from working. A 2.5L pack of Tetenal will develop around 30-40 rolls of film and last around 6 months from the date of being opened. I will process 14 rolls per 1/L of solution and 7 rolls in the final 500ml solution over the next few months.

Labels stuck on to the side of jar. Printed.

Highlighted 1L mix

Small chart in Tetenal instructions to keep track of the mix and films used with it. Development times increase after every 4th film used at 1L mixture ratio.
I mixed the chemicals following the guidelines in the Tetenal instruction booklet. The temperature requires great accuracy with a maximum deviancy of +-.05ºc for development. +-1ºc for the bleach fix and between 30-40 degrees for Stab & Rinse. Unfortunately just before starting the development process I realised my thermometer doesn’t go above 30ºc! The Tetenal instructions do have a development process at a lower temp (usual being 38ºc) however there may be some colour shift.
Eager to try the kit out and unable to wait for a thermometer with a larger range I decided to develop 1 of the 3 rolls of Lomography 100 I have shot at the lower 30ºc temperature to see how the development is affected compared to 38ºc. I used a bucket filled with water with a temp of around 33ºc (slight guess as there was no markings past 30ºc on the thermometer) to keep the chemicals warm. While the chemicals were warming I turned the lights out and loaded the film on to a spool.
Step 3: Develop

Stage 1 of development is a warm water bath for the negative for five minutes, during this time I kept checking the developer temp to ensure if stayed at 30ºc. The development times are pre-set by Tetenal however the agitation times are my own:
Water bath & pre heat developer tank 30ºc for 05:00m
Developer 30ºc for 08:00m (agitate for 15s every minute)
Bleach Fix 30ºc for 06:00m (agitate for 15s every minute)
Rinse around 33ºc for 06:00 (acceptable range of 30ºc – 40ºc change water every 30s)
Stabilizer 30ºc for 01:00m (acceptable range of 20ºc – 40ºc)
Processing in the bath.
Step 4: The moment of truth….

Step 5: Scan, Clean, Upload
There aren’t any predefined settings on Silverfast for Lomo 100 but I found the Fuji Superia 100 settings to work the best for this type of film. Images were scanned using a Plustek Opticfilm 8200i 35mm scanner with Silverfast 8. Scanned as PSD and imported to Lightroom & Photoshop. Images were spot, dust and scratch removal at 100%. Cropped to 6×4 ratio. No sharpening. I wanted to retain as much of the original negative colour and sharpness (otherwise, what is the point?).

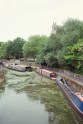
Camden Market f/2.8 Canon EOS 620
It is times like this when I see a negative that I have developed myself and think “why did I not do this from the beginning?”. Honestly! Everyone should develop their own film, the results are far superior than that of any lab I have ever sent film to. The negative is well developed, colours are consistent and it was extremely fun!

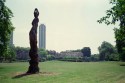
London f/4 Canon EOS 620
Have a look at the gallery below to see more.